In this post I'm going to go over each step to get your Raspberry Pi ready for ruby development. In setting up my RPi I've found that there is a lot of outdated information on the web. I've created an up to date list of steps here.
Note: Be ready to step away from the computer during the setup process. The RPi is cool, but quite slow.
Supplies
At a minimum you will need (these are the parts I bought):
Note about power supplies: There are cheaper ones, but you have to weigh that risk against setting your home on fire. In particular, you want to verify that the power supply is UL-certified.
This cost me about $67, but could be cheaper if you already have some of these parts.
Pick an OS
The first step is to pick which distribution to run on your RPi. Looking at the comparison table I decided to go with Raspbian. This was chiefly because I've used Debian and Ubuntu in the past. That being said, there are many other distrubtions available for RPi.
The next step is to download the image
here. I downloaded the
2014-01-07-wheezy-raspbian.zip version and unzipped it.
Set up the SD Card
You will need an SD card for storage on the RPi. I went with Transcend 32 GB Class 10 SDHC. Class 10 is the recommended speed for use with RPi. Any faster would be limited by the RPi's bus.
Plug the SD card into your Mac and determine disk name by running
diskutil list.
The output will be similar to this:
/dev/disk0
   #:                       TYPE NAME                    SIZE        IDENTIFIER
   0:      GUID_partition_scheme                        *500.3 GB   disk0
   1:                        EFI EFI                     209.7 MB   disk0s1
   2:                  Apple_HFS Macintosh HD            499.4 GB   disk0s2
   3:                 Apple_Boot Recovery HD             650.0 MB   disk0s3
/dev/disk2
   #:                       TYPE NAME                    SIZE       IDENTIFIER
   0:      GUID_partition_scheme                        *998.6 GB   disk2
   1:                        EFI EFI                     209.7 MB   disk2s1
   2:                  Apple_HFS Time Machine Backups    998.2 GB   disk2s2
/dev/disk5
   #:                       TYPE NAME                    SIZE       IDENTIFIER
   0:     FDisk_partition_scheme                        *32.1 GB    disk5
   1:             Windows_FAT_32 boot                    58.7 MB    disk5s1
   2:                      Linux                         32.1 GB    disk5s2
You can determine which /dev/disk your RPi is by matching up the
Volume name with the value in the NAME column. Here my RPi is
/dev/disk5, and the volume name is boot.
Next, unmount the volume with sudo diskutil umount /Volumes/boot.
If you don't unmount the SD card first, you will receive an error about the
device being busy when trying to image it.
Finally, copy the OS image to the SD card with dd if=2014-01-07-wheezy-raspbian.img of=/dev/disk5 bs=1
Go have some non-computer time. This took roughly an hour when I did it.
Boot the OS on your RPi
Once dd has completed:
- Remove the SD card from your Mac
- Plug the SD card into the RPi
- Plug your RPi into your network with an ethernet cable
- Power the RPi on by plugging it in and wait a couple minutes for it to boot
- Look up the address via your router

Here, my RPi is listed as 192.168.1.229
Login via ssh with default user (pi) and default password (raspberry)
ssh pi@192.168.1.229
If you run df -h you will see that your install isn't using all of
the available storage on the SD card. You need to expand the SD card
by running:
sudo raspi-config and selecting the expand option.
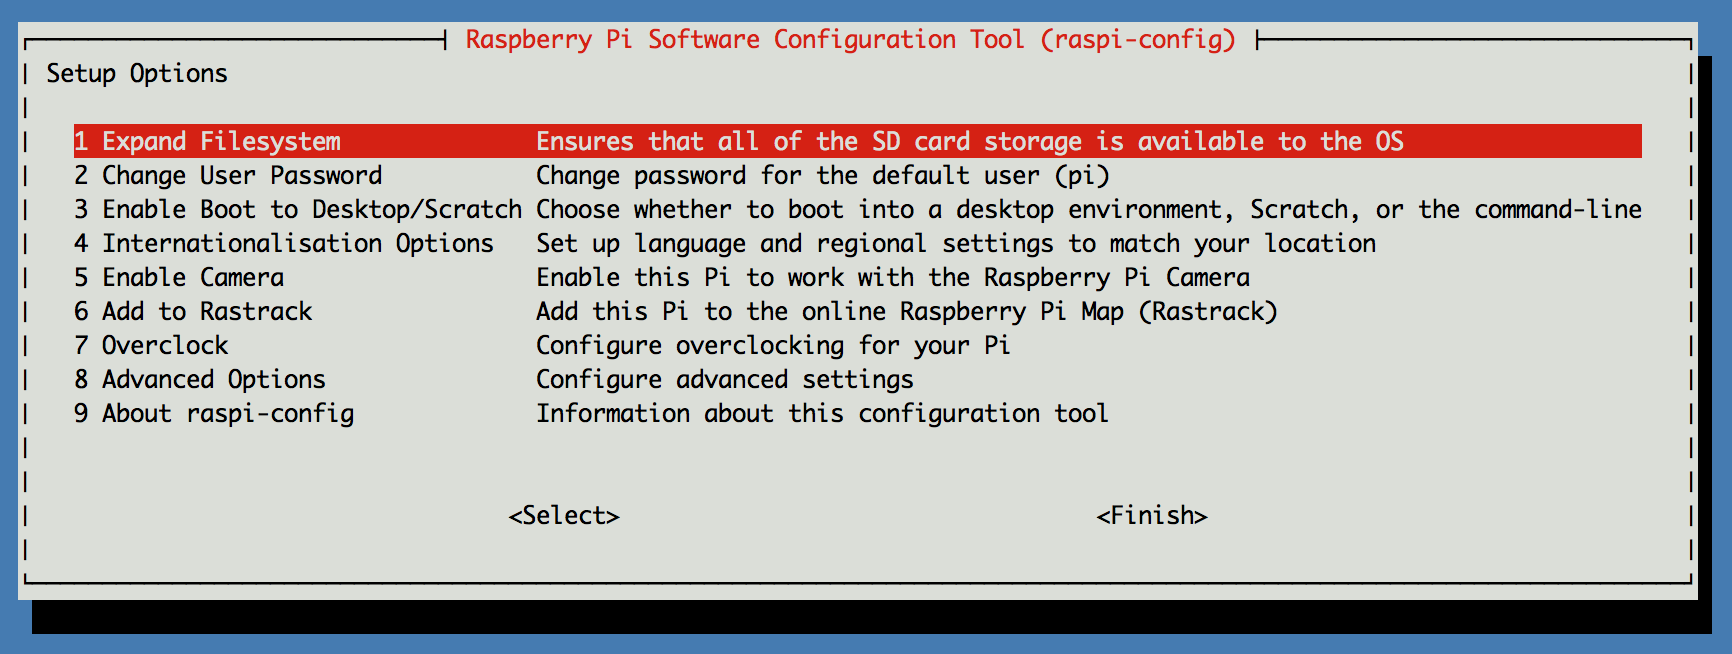
I also recommend selecting option 2 and changing the default password.
Out of the box my RPi was set to the en_GB locale. You can set the
correct locale and timezone by running:
sudo dpkg-reconfigure locales
sudo dpkg-reconfigure tzdata
Next, make sure the latest packages are available before you get to installing software:
sudo apt-get update
Set your Shell (optional)
Raspbian comes with bash as the default shell. If that's fine for you, skip this section.
Zsh can be installed by running:
sudo apt-get install zsh
chsh
Then enter /usr/bin/zsh for the new shell.
Set up Ruby
I found the following dependency was missing out of the box:
sudo apt-get install libssl-dev
Get rbenv with:
git clone https://github.com/sstephenson/rbenv.git ~/.rbenv
git clone https://github.com/sstephenson/ruby-build.git ~/.rbenv/plugins/ruby-build
git clone https://github.com/sstephenson/rbenv-gem-rehash.git ~/.rbenv/plugins/rbenv-gem-rehash
Add the following to your .bash_profile or .zshrc
eval "$(rbenv init -)"
Reload your shell (or simply login again) and run:
rbenv install 2.1.1
rbenv global 2.1.1
Or whatever version you prefer. To confirm everything is set up run:
ruby -v
ruby 2.1.1p76 (2014-02-24 revision 45161) [armv6l-linux-eabihf]
Set up Node.js
I set up node because some ruby gems require a javascript runtime. Installing node looked easier than getting v8 to work on RPi. Simply run:
wget http://node-arm.herokuapp.com/node_latest_armhf.deb
sudo dpkg -i node_latest_armhf.deb`
On the Next RPi Post
I've noticed some flakiness on my laptop's Internet connection, but I'm unclear what the cause is -- is it Comcast or some of the servers I hit actually being down from time to time?
In my next post, I'll go over how I set up my first RPi project. It will run a basic dashboard displaying various network connectivity metrics.